Sales Funnels
Sales funnels are essentially a dedicated webpage or website that is designed for the purposes of capturing the customer’s name and email address. Unlike content or membership sites, you cannot navigate from one page to another. You need to direct your clients or subscribers from one page to another.
Typically, optin form, buy now and download buttons are featured on the landing page. It is where you get people to sign up.
If you would like to create a sales page, please make sure that you have set up all the other features that you want to incorporate or have in this page.
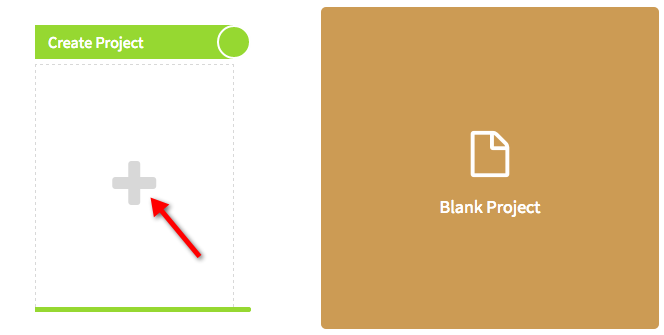
1. Create a blank project.
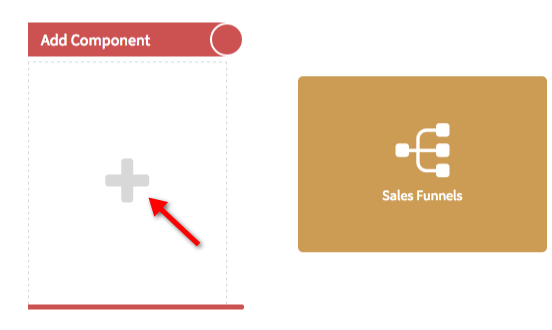
2. Click the "+" icon in "Add Component" and select "Sales Funnels".
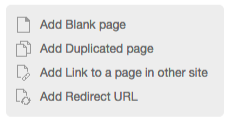
3. Right or double click to add a new page. You can add a "Blank Page", "Duplicated Page", "Link to a page in other site" or "Redirect URL". Blank page is a totally new page, Duplicated page is a duplicate of another page from any projects or from the current project youre working on, Link page and Redirect URL – this redirects your subscribers to another page and can be a 3rd party page.
4. "Fixed Pages" can be seen at the bottom of each page, such as "Contact", "Privacy Policy", "Terms & Conditions", "Earnings Disclaimer" and "Purchase Agreement". If you don’t want them, just uncheck the ones that you don’t want to be seen.
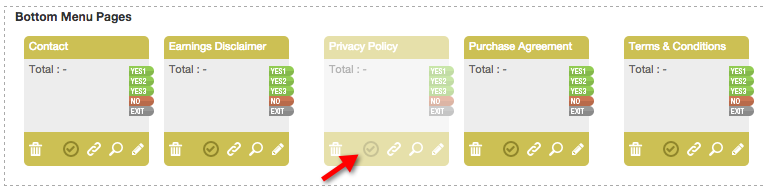
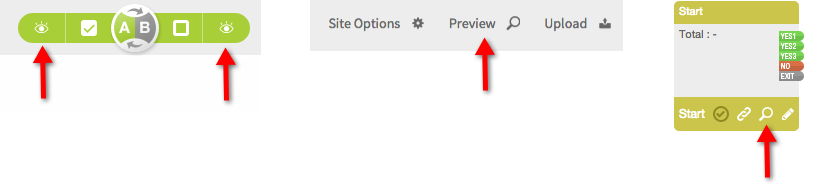
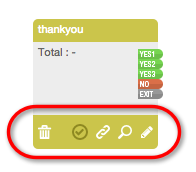
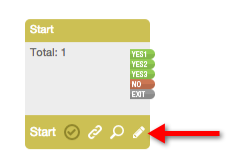
5. The icons for pages include “Delete”, “Show”, “URL”, “Preview” and “Edit”.
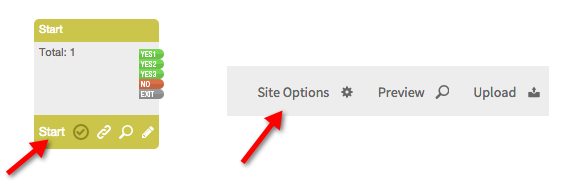
6. The page with the "Start" is your home page. You can also change this in "Options".
7. A simple sales page (which is also called a lead page, landing page or squeeze page) and thank you page are the most commonly used.
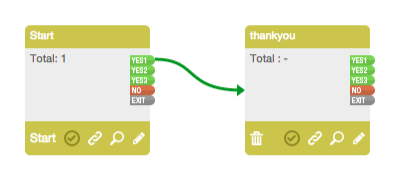
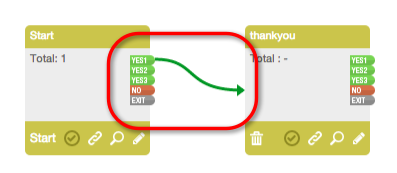
8. Each sales page has several nodes that you can link to another page. There can only be one "Exit" node connected to another page per sales page. The "No" node is usually used with "No, thank you" buttons and when you have upsell. You can connect one page to another by using the node, otherwise the page will not lead anywhere. Click on the node to remove it.
9. Click on the "Pencil" icon to edit any page.
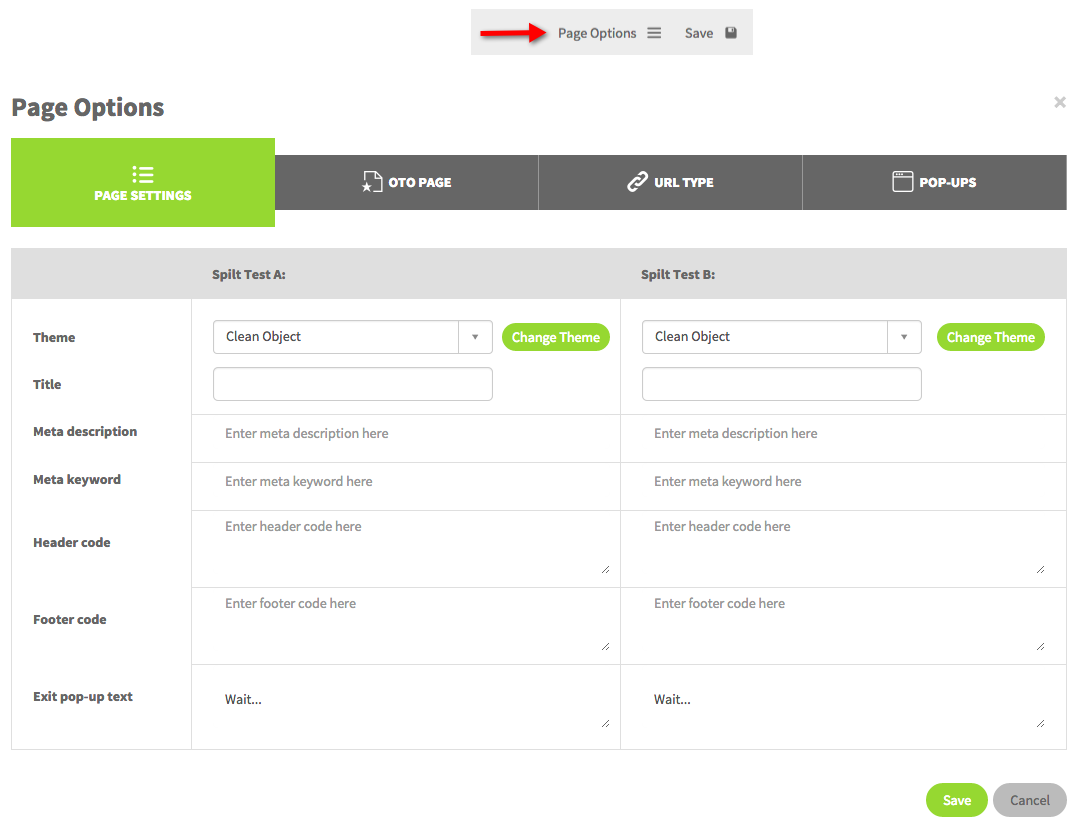
10. After clicking on the pencil, select "Page Options". This allows you to alter page settings, such as title, meta description, meta keyword, header cope, footer code and exit pop-up text. Realize that you have the option of customizing Split Page A and B. If you want to know more about split pages then view split pages tutorial.
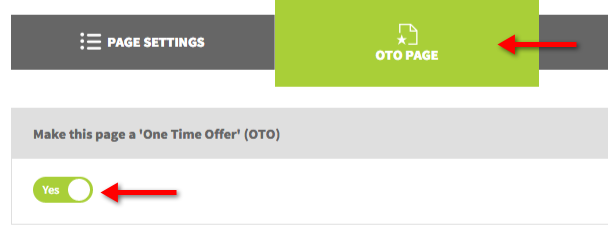
11. Click on "OTO Page" and enable it if you would like to ‘make this page a one time offer’.
12. For URL type, you can encrypt the url to create a system generated URL. You can also create a "Slug". The slug should not have any spaces, upper case or unnecessary characters because it can conflict with the code. You use slug if you want a short url that’s easily readable. Usually, the system will use the name of your page but you can always specify a better one if you like.

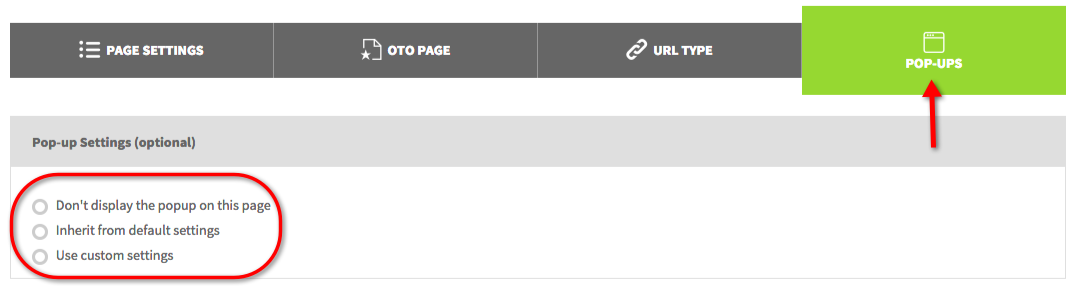
13. You also have a few options for customizing pop-up settings.
14. Lastly, you can click on the "Eye" icon in editor mode in order to preview the current page. Alternatively, you can preview it by clicking on "Preview" at the upper right hand corner or the preview icon of each page.