Member Manager
The Member Manager feature allows you to see all the details of your members, including profile, payment, product, membership, subscription and emails. It is essentially the place where you can access data for each of your members.
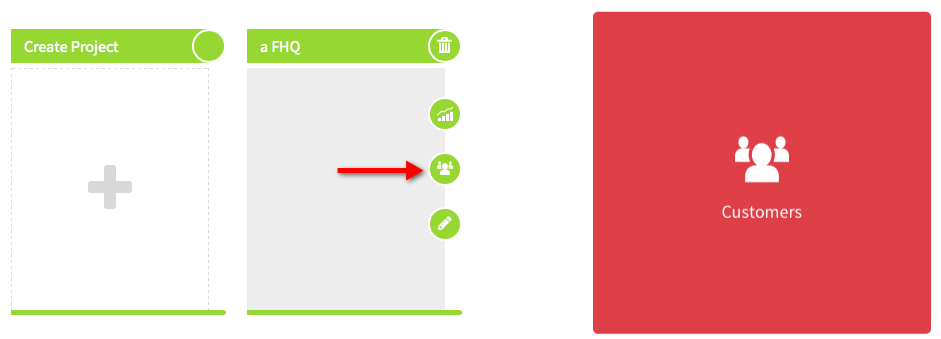
1. On the main project page, locate the project that you want to view the members of. Click the middle icon to access the manager. Then select "Customers."
2. This will take you to a page with all of your members names, along with other details. Click on "Manage Member" on the right hand side of the page.

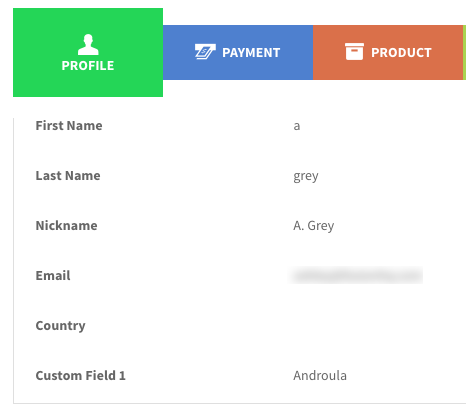
3. There are several tabs for each member. These include "Profile", which gives the first name, last name, nickname, email, country and custom field from opt in.
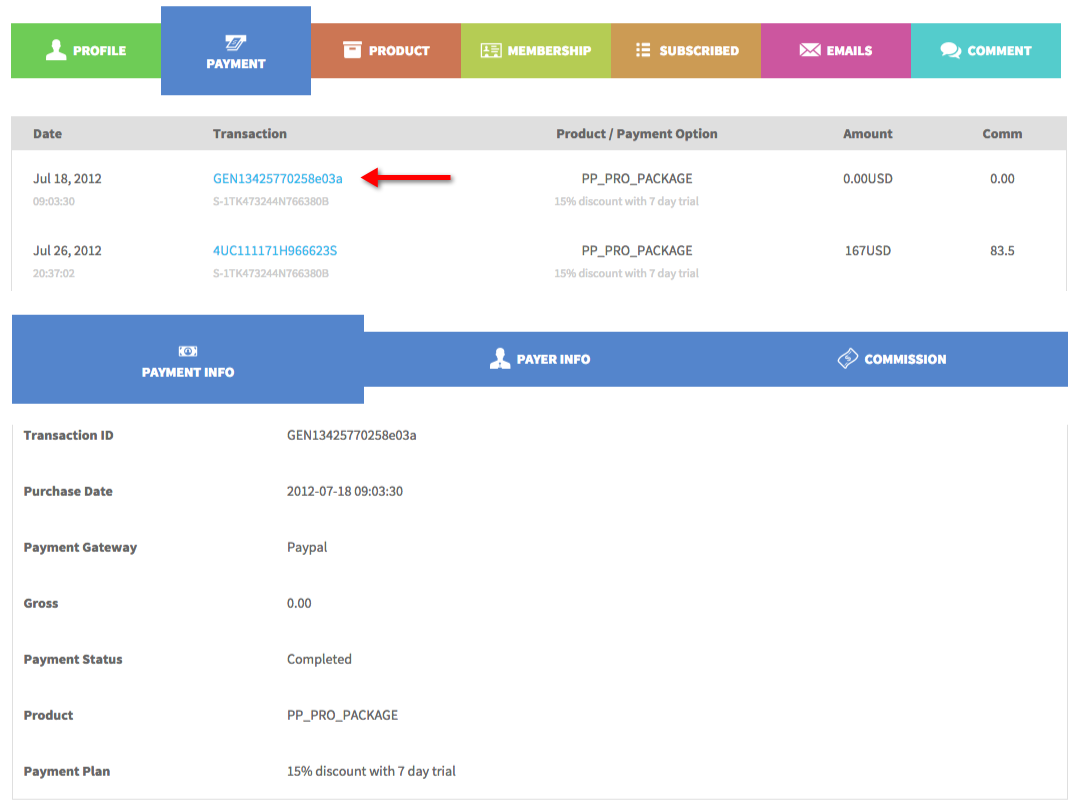
4. "Payment" provides payment details such as date that the customers bought your product, transaction ID, product/payment option, amount and commission. You can click on "Transaction" to see more details about payment and affiliate commission.
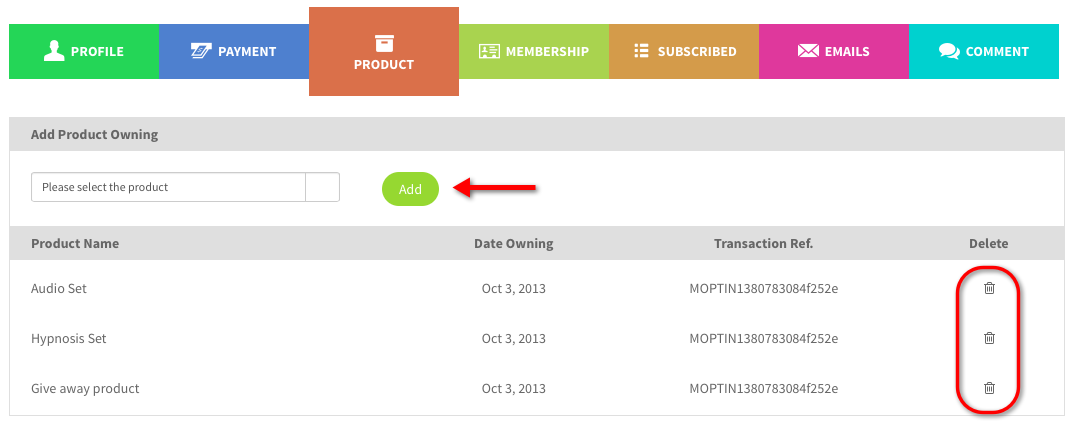
5. "Product" lists the products that this member owns. If you want to give a product to this customer manually, you can select the product from the dropdown and click "Add". Click "bin" icon if you want to remove the product owning.
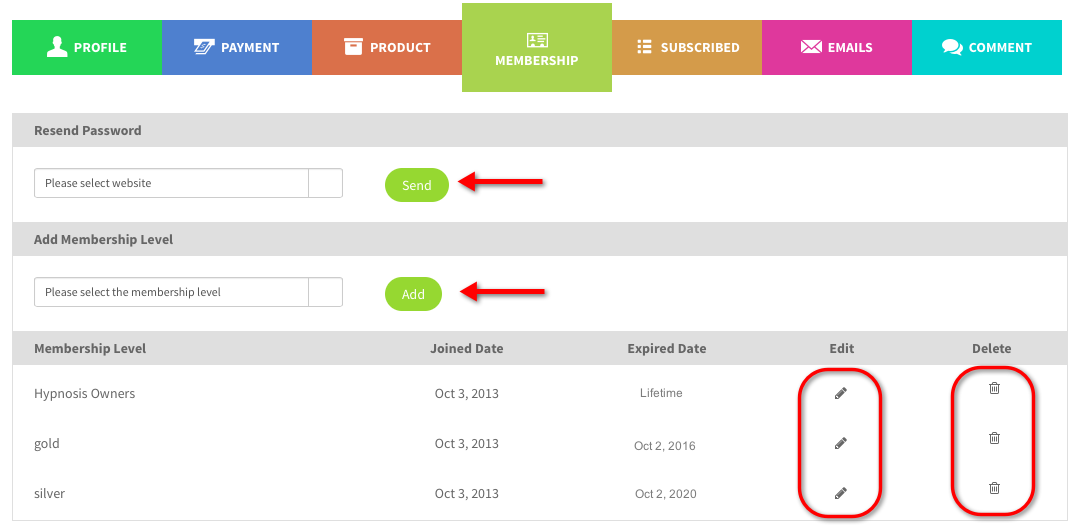
6. Under the "Membership" tab, you can see which membership level this customer has. You can add more or resend password. Click pencil icon to change the customer’s detail eg. name, email, expiry date and select the duration of the membership level. If you make any changes, be sure to click "Save".
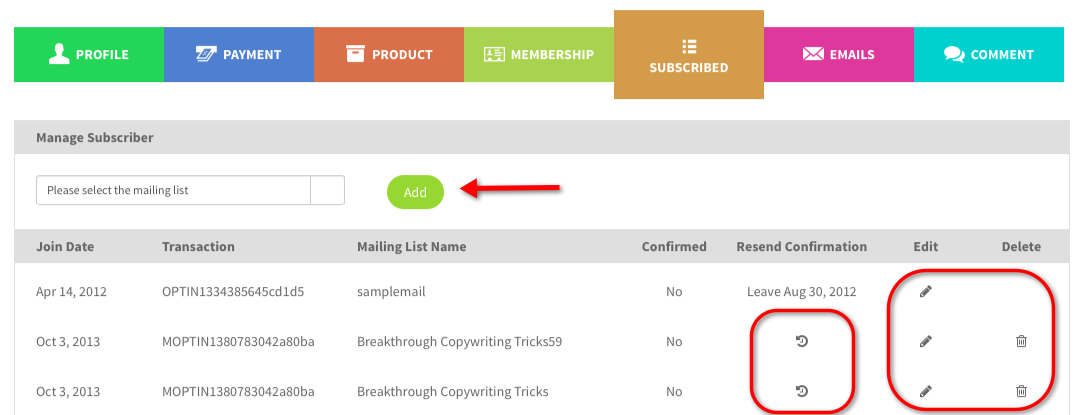
7. Under the "Subscribed" tab, you can see the mailing lists that the member is subscribed to. You can add the customer to more lists by selecting the mailing list from the dropdown and click "Add". Details at the SUBSCRIBED include joined date, transaction, mailing list name and confirmed.
"Confirmed" describes whether or not the member has confirmed their subscription to the mailing list. You can choose to resend the confirmation by clicking the "Resend" icon.
You can also edit subscriber info by clicking on the "pencil" icon. If you make any changes, make sure to click "Save". You can also delete any of the subscriptions by clicking the "bin" icon.
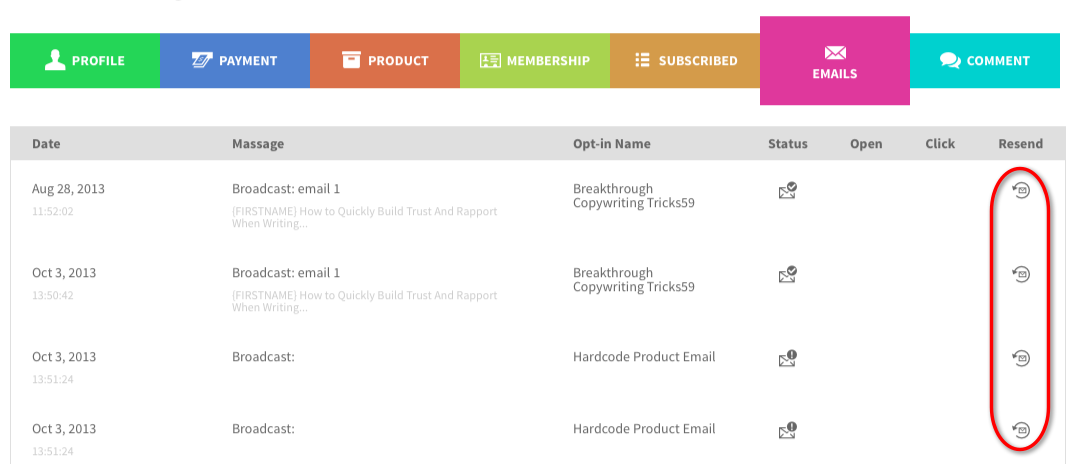
8. Under the "Emails" tab, you can view which broadcast email or automated message that this customer received and if he opened or clicked the link in the message or not. You can also click to resend the email.
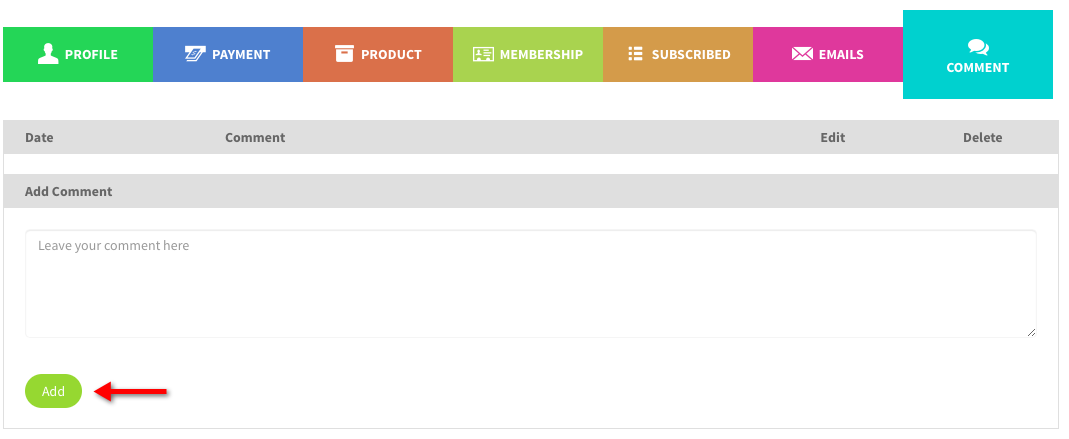
9. Lastly, under the "Comments" tab, you can add any comments relating to the member.