
Add An Existing Domain

If you already have a domain and want to use it with your website, no worries, FusionHQ allows you to use your own preferred domain even if you bought it from somewhere else.
You have 2 options to use the existing domain: (1) with FusionHQ hosting or (2) with any external hosting.
Option I: With FusionHQ Hosting
Before you can use FusionHQ hosting, please make sure that the DNS or domain name server is changed to our DNS which are:
NS1.POINTDOMAIN.NET
NS2.POINTDOMAIN.NET
If you don't know how to change the DNS, you can request the company that you purchased the domain from to change it for you. No need to change the IP. Change only the DNS and need to change both NS1 & NS2. After the DNS is changed, then you need to verify the domain to FusionHQ system.
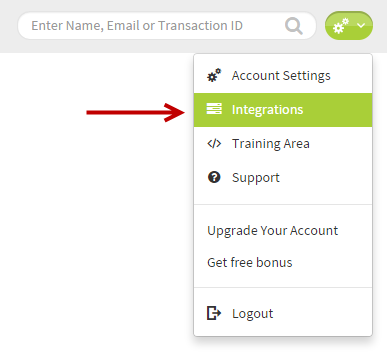
1. Click the top right hand corner and select Integrations.
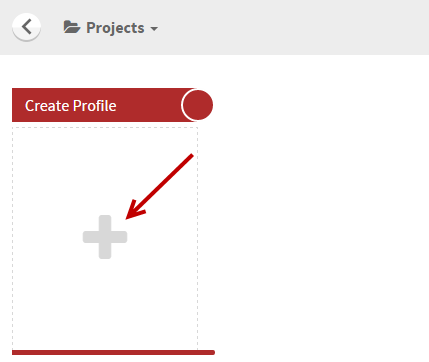
2. Click Create Profile.
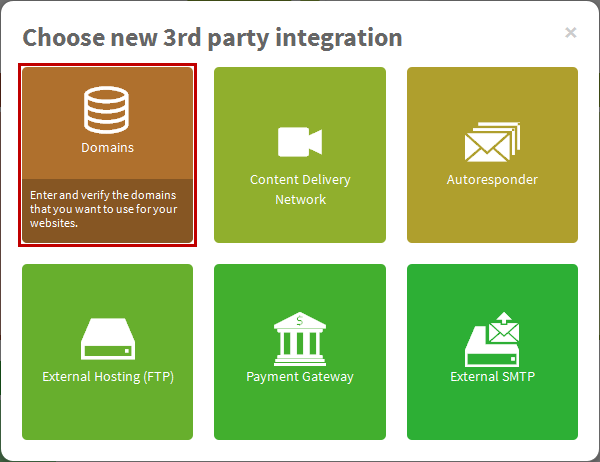
3. Select Domains.
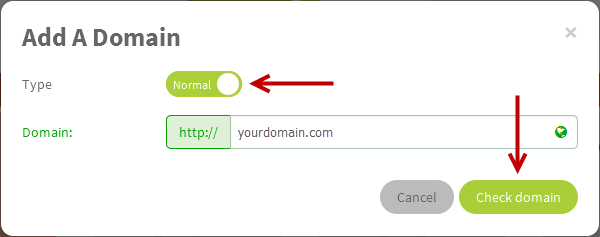
4. Enter your domain into the field. For type, select Normal and click the Check domain button to check its availability.
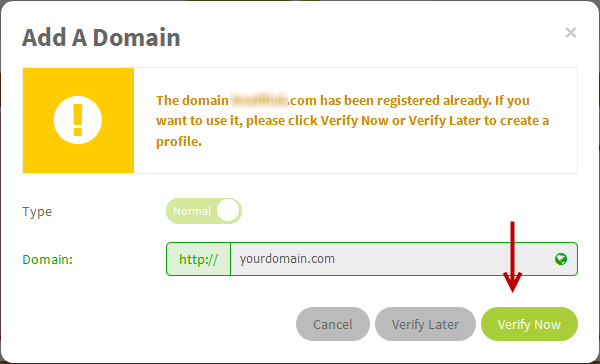
5. The system will show that the domain is already registered. Click the Verify Now button.
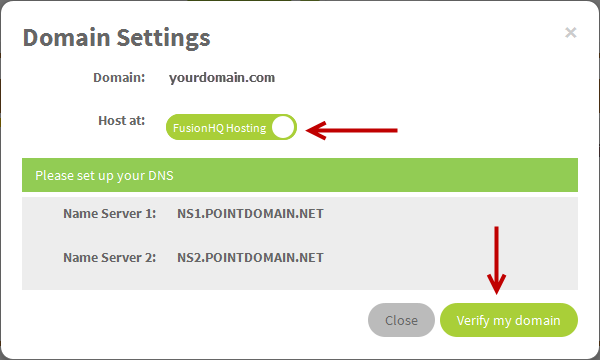
6. At Host at, select FusionHQ Hosting and click the Verify my domain button to finish the process.
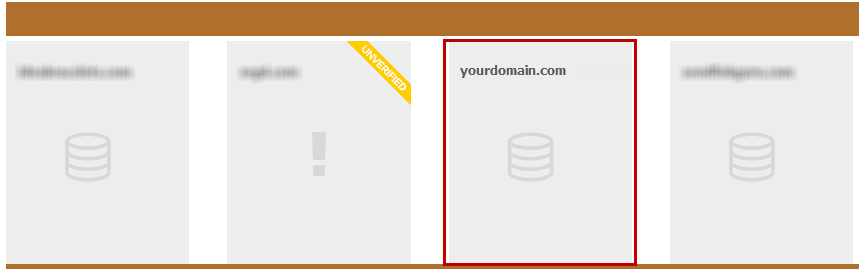
7. Once the domain is verified, your domain is now ready to use. Next, skip to step 11 to select the domain with your website.
Option II: With External Hosting
If you have a domain which is hosted elsewhere and you want to use it but you do not want to move it to FusionHQ hosting, not a problem!
Before you go for this option, make sure that you already have the correct FTP details, such as username, password and directory path, from your host provider.
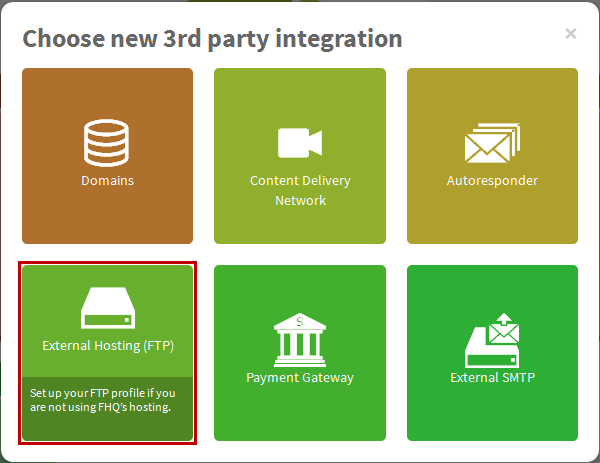
1. Click the icon on the upper right hand corner of your page and select Integrations.
2. Click the + icon under Create Profile.
3. Select External Hosting (FTP).
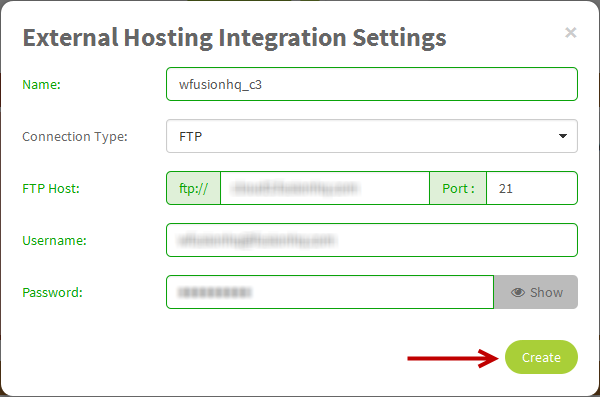
4. Fill in the necessary details
- Enter the name of the profile for your reference.
- Next select the Connection Type. You need to check this detail with your hosting provider if your domain is secured or not.
- Fill in the FTP host, Username and Password. Please check this detail with your hosting provider.
- Click the Create button.
5. Your FTP profile is now ready.
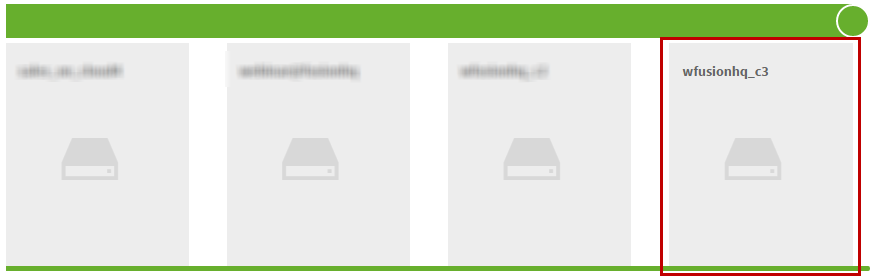
6. Then return to Integrations. Click the Add button under Create Profile and select Domains.
7. Enter your domain into the field. For type, select Normal and click the Check domain button to check its availability.
8. The system will show that the domain is already registered. Click the Verify Now button.
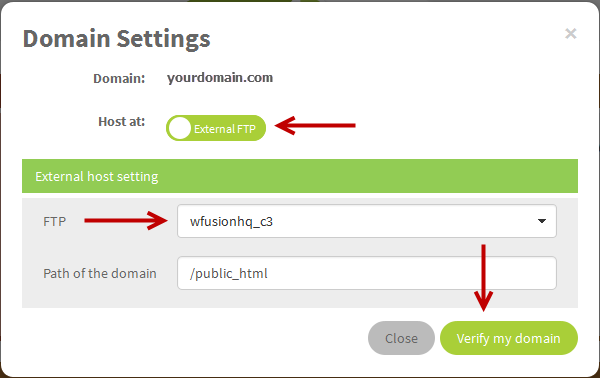
9. At Host at, select External FTP option.
- Choose the hosting profile (or FTP profile) that you just created from the dropdown list. Enter the Remote Path. Some providers call it the Root Path, Directory Path or Root Directory. If you don’t know what it is, please contact your hosting provider.
- Click Verify my domain to save the changes and to add your domain to FusionHQ system.
10. Once the domain is verified, your domain is now ready to use.

11. After your domain is added & verified to your FusionHQ account, go back to your project.
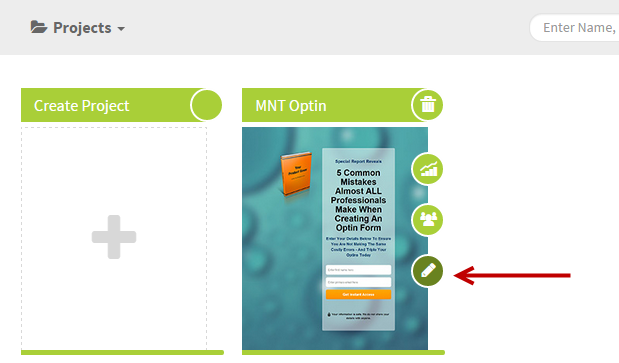
12. Select the Sales Funnels or Content Site.
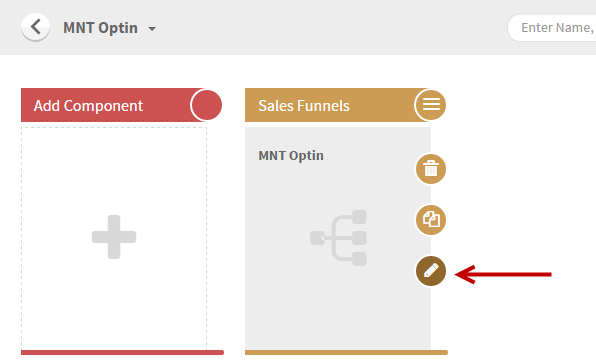
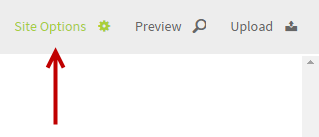
13. Select Site Options which is on the top right corner.
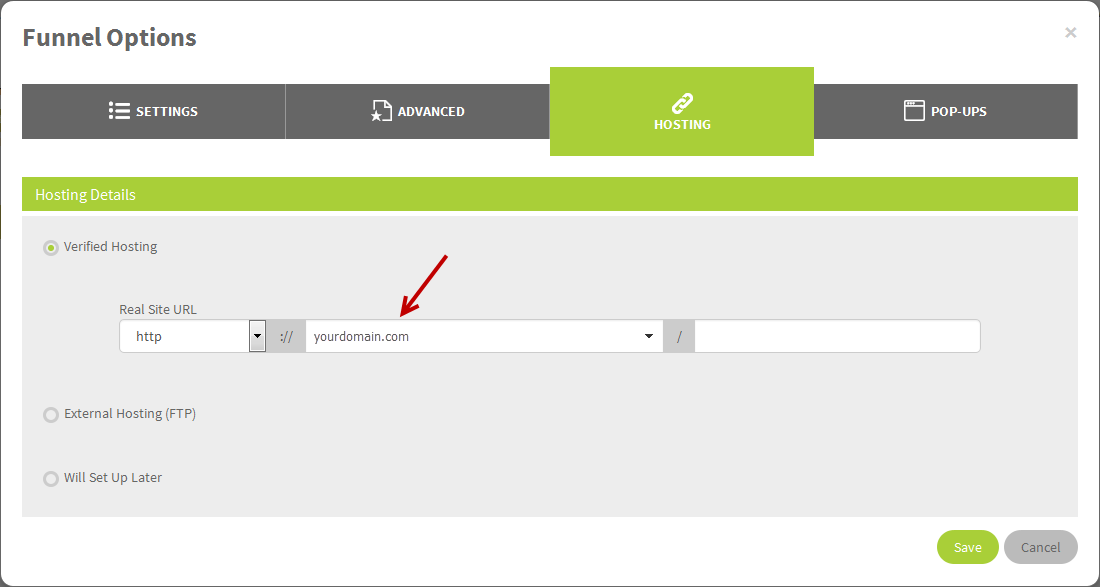
14. Go to Hosting tab and at the Verified Hosting, select the verified domain from the dropdown. Then save change.
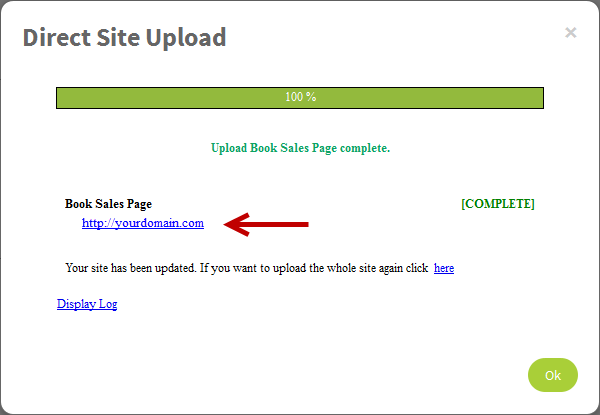
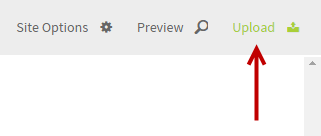
15. Click Upload icon which is also on the top right corner to make your site live.
16. After your website is uploded, you will see the url of your website or your sales funnel / content site.